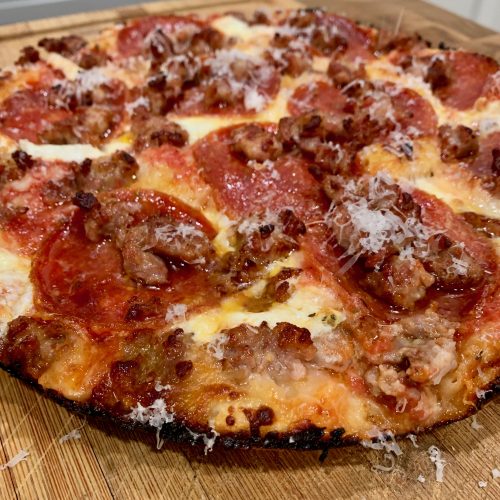
A hand made pan pizza recipe for those who love a thick and crispy golden crust – this pizza recipe is quick and easy. When it comes to comfort food, few dishes can rival the irresistible appeal of a cheesy, homemade pan pizza. The combination of a crispy, golden crust, gooey melted cheese, and a medley of flavorful toppings is enough to make any pizza lover weak at the knees.
By following this simple recipe and adding your own personal touch with a variety of toppings, you can create a cheesy hand made pan pizza that is customized to your liking. Enhance your pizza night experience by pairing your cheesy handmade pan pizza with our classic Caesar salad for a combination that will truly wow your taste buds. So, roll up your sleeves, preheat your oven, and let the aromatic scent of baking pizza fill your kitchen. Get ready to experience the sheer joy of biting into a slice of cheesy perfection that will satisfy your cravings and warm your soul. Enjoy!
-MBK

Hand Made Pan Pizza
Ingredients
- 6 ounces grated mozzarella (about 1 1/4 cups, loosely packed)
- 1/3 to 1/2 cup 74g to 113g tomato sauce or pizza sauce, homemade or store-bought
- freshly grated Parmesan cheese
- 1 recipe Pan Pizza Dough
- 1 recipe pizza seasoning
Instructions
- About 3 hours before you want to serve your pizza, prepare your pan. Pour 1 1/2 tablespoons (18g) olive oil into a well-seasoned cast iron skillet that’s 10” to 11” diameter across the top, and about 9” across the bottom. Heavy, dark cast iron will give you a superb crust; but if you don’t have it, use another oven-safe heavy-bottomed skillet of similar size, or a 10” round cake pan or 9” square pan. Tilt the pan to spread the oil across the bottom, and use your fingers or a paper towel to spread some oil up the edges, as well.
- Transfer the dough to the pan and turn it once to coat both sides with the oil. After coating the dough in oil, press the dough to the edges of the pan, dimpling it using the tips of your fingers in the process. The dough may start to resist and shrink back; that’s OK, just cover it and let it rest for about 15 minutes, then repeat the dimpling/pressing. At this point the dough should reach the edges of the pan; if it doesn’t, give it one more 15-minute rest before dimpling/pressing a third and final time.
- Cover the crust and let it rise for 2 hours at room temperature. The fully risen dough will look soft and pillowy and will jiggle when you gently shake the pan.
- About 30 minutes before baking, place one rack at the bottom of the oven and one toward the top (about 4″ to 5″ from the top heating element). Preheat the oven to 450°F.
- When you’re ready to bake the pizza, sprinkle about three-quarters of the mozzarella (a scant 1 cup) evenly over the crust. Cover the entire crust, no bare dough showing; this will yield caramelized edges. Dollop small spoonfuls of the sauce over the cheese; laying the cheese down first like this will prevent the sauce from seeping into the crust and making it soggy. Sprinkle on the remaining mozzarella. If adding additional toppings like pepperoni or sausage, add them at this time.
- Bake the pizza on the bottom rack of the oven for 18 to 20 minutes, until the cheese is bubbling and the bottom and edges of the crust are a rich golden brown (use a spatula to check the bottom). If the bottom is brown but the top still seems pale, transfer the pizza to the top rack and bake for 2 to 4 minutes longer. On the other hand, if the top seems fine but the bottom’s not browned to your liking, leave the pizza on the bottom rack for another 2 to 4 minutes. Home ovens can vary a lot, so use the visual cues and your own preferences to gauge when you’ve achieved the perfect bake.
- Remove the pizza from the oven and place the pan on a heatproof surface. Carefully run a table knife or spatula between the edge of the pizza and side of the pan to prevent the cheese from sticking as it cools. Let the pizza cool very briefly; as soon as you feel comfortable doing so, carefully transfer it from the pan to a cooling rack or cutting surface. This will prevent the crust from becoming soggy.
- Cut, serve and enjoy!